Sunday, December 22, 2013

DIY: Freebie Dresser Turned Entertainment Center

I've been on the lookout for the ideal TV stand for quite awhile. I needed it to be sturdy against little baby hands and hide/secure all my movies and super old Nintendo and Playstation games so Lil Man didn't throw 'em around the basement. Of course, Pinterest spoke to me and told me to scour Craigslist for a cool DIY idea. 

I found this dresser on Craigslist for free. Woot! However, the previous owner left it out in a ditch on the side of the road for a couple days. So on my lunch break, I ran out to the middle of nowhere and lifted this beast into the back of my Durango by myself. Got it home and carried it down the basement steps... by myself. Yeah, this damn free dresser was going to give me a hernia, no doubt. 


Other than the couple bucks I spent on some quarter round, this project was entirely free. I used the leftover white and grey paint from Brody's nursery, reused the original hardware (just added some silver spray paint) and the quarter round was used to clean up a rough edge. 

The top two drawers were removed to accommodate my DVD and VCR (yes, I still have one of those.) I'm still looking for a basket that'll fit in that space to hold the remotes and whatnot, but in the meantime... 


I was very glad that some ammonia and lots of scrubbing did wonders for this dresser. It was in rough shape and because it was laminate, sanding wasn't an option. The original owner also left the bottom two drawers filled with family photos. When I contacted him in order to give them back, he told me to throw them out. Omg. As a picture hoarder, I felt I was committing some sort of crime! Gah. 

Overall, I'm super excited about how this turned out! 


Sunday, December 15, 2013

DIY: Busy Box for Boys

I've known since this summer that for Brody's first birthday, I wanted to make him something. Thanks to Pinterest, there are an abundance of DIY ideas out there... so I just had to pick one. Since a lot of the projects I came across weren't quite age appropriate, I decided on a DIY busy box for boys. 


I loved this project start to finish. I found most of the components at several West Michigan Restores. It was like a treasure hunt digging through all the bins finding just the right things that clicked, spun, opened, dinged, boinged and latched... I loved it. 


A huge thank you to Papa Z for all his help getting the board prepped. We opted to go with pressboard to cut down on splinters and used a handheld router to round all the edges for safety purposes. 


Three slits were cut down each end so that velcro scraps can be used to secure the board to a piece of furniture or other sturdy object. This beast weighed quite a bit when it was all said and done, so I would highly recommend taking some sort of action to stabilize it rather than just lean it against a wall. 


Painting was a ton of fun. I opted for traditional caution tape colors and stripes. 


A lot of the pre-used gadgets had some wear and tear, so most of them were spray painted to give 'em a fresh look. I used gold, silver, black and white spray paint to keep everything looking cohesive.


We used extra pressboard to create two 6"x6" doors... one opening to the side and the other opening at the top. I created little picture sleeves out of black binding covers and a transparency. 


Mama Z came up with the great idea to include a functioning doorbell. :)


I found this stove knob and arrow that somehow had to be included. So thankfully I came up with the clock BEFORE I started painting. I left a large enough circle to encompass the entire arrow and painted on the numbers using a toothpick. 


Friday, December 6, 2013

12 Days of DIY Ornaments: Christmas Card Ornament Ball

To kick off the Christmas season, I've teamed up with Tawny and ten other wonderful ladies to give you the 12 Days of DIY Ornaments. Today's my day and I'm dusting off an oldie. Be sure to swing by these other blogs and see what they've put together! 


December 1st: Tawny's Tid Bits
December 3rd: Simply {Darr}ling
December 4th: My So Called Chaos
December 5th: Madtown Macs
December 6th: Andrea Arch
December 7th: Always & Forever
December 9th: My Better Half and Me
December 10th: Sparkling with Sneakers
December 11th: Life with Amberly & Joe
December 12th: My Three Bittles


These fun paper ornaments can be made out of old Christmas/greeting cards or regular cardstock. You will need the following supplies:

1", 1.5" or 2" hole punch
Old greeting cards or cardstock
Xacto knife or scoring tool
Fish line/yarn/string/ribbon
Glue
Triangle template (download here)


You will need 20 circles (all the same size). Have fun mixing colors and patterns!


Cut out the appropriate triangle template and trace it on every circle. Use a scoring tool of the tip of an xacto knife to gently score all three sides. Fold the flaps inward.


Your top and bottom pieces will be created using 5 circles each. Fill in the middle section with the remaining 10 circles. 


At some point, don't forget to tape one end of the string onto the inside.


Ta da! Thanks for swinging by and be sure to check out the rest of the ornament tutorials from the other ladies. :)

Monday, December 2, 2013

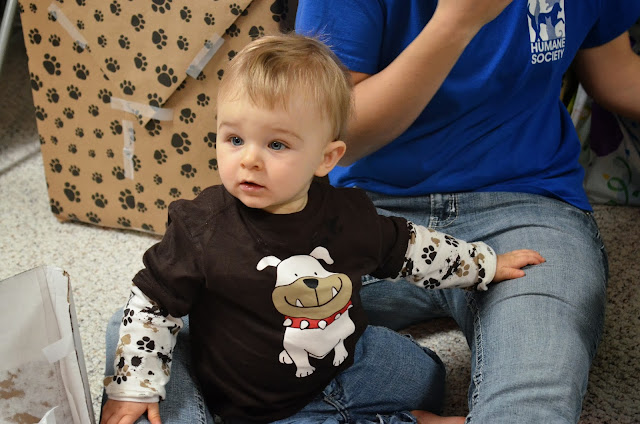
Brody's Puppy Themed Birthday Paw-ty

Saturday night we celebrated Brody's 1st birthday with a dog themed paw-ty surrounded by family and friends. It was a wonderful evening and I'm so happy with how everything turned out... especially since I've been planning since I was pregnant. (No judging.) 

A huge thank you to Mama Z for all of her help with food preparation and making sure the entire party ran smoothly. Couldn't have pulled it off without her. 


Mama Z Santa gave me my Silhouette machine early in order to get ready for the party. Thank God because there's no way I was cutting out that many doggies by hand.


My initial thought was to create a pennant banner across the room with my favorite pictures of Brody spanning the entire year. As I went to hang them up, I realized I had, well... a lot. So they took over the entire perimeter of the room. Oh well. :)


Yes, that's puppy chow... in a puppy dish... on puppy paper. The adorableness is overwhelming.


I took a picture every month of Brody in the nursery rocker wearing a white onesie. I'm so pleased with how this turned out. For a better view, click here.


And no puppy paw-ty is complete with fire hydrants, so I made 3 of these little guys. Super cheap and easy to make... oatmeal canister, cheap Dollar Store bowl, pop bottle lid, floral arrangement foam cylinder (cut in half), egg carton, cardboard and red spay paint. I used skewers poked all the way through hold on the foam and glued the rest. Pretty self explanatory. 


We feasted on salad, garlic toast, spaghetti and meatballs, and...


...dog bones. Adorable, little dog bone breadsticks. Gaaaaah. Pillsbury breadsticks rolled out and the ends tied in knots. Had to do it.  


We went all out on the desserts (of course). The main puppy cake was made out of two heart shaped cakes (one white cake, one black magic) and the tongue is a biscotti cookie (the kind they serve you on airplanes).


Then we carved a tiny smash cake for Brody out of one circle black magic cake. Gaaaahhh. I die.


There were also pupcakes up for grabs. The paw pieces were made from a chocolate sugar cookie recipe and punched out from this cookie cutter. The bones were a classic sugar cookie recipe brushed with a powdered sugar frosting.


At this point, Brody was on his fourth cake of the week, so I was a little nervous that he was going to look at it and hurl. He didn't go quite as balls out as I would've hoped, but he loved it and it was perfect.


Had to show him how it was done... right? 


Mmm, chocolate kisses. Or licks. Whatever. 


Brody was showered with the most awesome gifts from such an amazing group of people. A huge thank you to my parents, siblings, grandparents, aunts, uncles, cousins and friends for showing so much love and support on such a special day. Minus the fact that we were missing just a few of my favorite people, the day was so perfect. Thank you all!


I've been working on this busy box for Brody for several months now. He seemed to love it! ♥ A step-by-step tutorial will be on the blog later this week. 


Future Ferris Bulldog and lovin' the bat mobile from Grandma and Grandpa Z.


Both Brody and Zora are huge fans of this new car... already had to fish the loose pieces out of Zora's mouth. Oh pup. 

Thanks Aunt Z for the cool puppy hat and new truck! Mama loves pushing him in circles around the basement over and over and over and over and... ;)


Other than our one playdate with cousin Jack, Brody hasn't been exposed to other lil ones. Friends Sarah and Josh and their son Asa joined the celebration and Brody was fascinated with this other small person running around. I can't wait to have future playdates!

Thanks again for all the birthday wishes, wonderful gifts and the support and celebration as we look back on an incredible year for such a precious little boy.

Read my open letter to Lil Man here.
Pin It button on image hover