Saturday, April 14, 2012

Donating time + talent

I'm a firm believer that if you are blessed with a certain talent or skill, there's no reason that you shouldn't use that gift to better a cause or circumstance... without seeking reward or monetary gain. I've blogged a few times about my favorite news cast showcasing how photographers are donating their time and skill to take better adoption photos for local animal shelters. Well, I'm no photographer, but I do know a thing or two about marketing and design. I just wanted to take the time to showcase a few projects I've taken on pro-bono to prove that it doesn't take much time or effort to make a difference in a cause you feel passionate about.

So get out there people. Donate your time and talents to whatever cause floats your boat. It's worth it.

Logo design


Logo design
Website design & maintenance
Twitter account setup and maintenance
YouTube channel setup and maintenance


Fundraising group logo design

Monthly e-newsletters

Monday, April 2, 2012

DIY: "Silk-Screened" Easter Eggs

Tired of staining your eggs (and fingers) in that same 'ol typical Easter Egg dye? I am. Here's a different way to make your eggs oh-so-beautiful by using silk ties!


You'll need 100% silk ties (or scarves) for this tutorial. Be sure to check the tag... the polyester blends won't do. I picked these up at my thrift store of choice for a $1 each. Not bad at all. Don't worry if they're ugly, old people ties... the transfer will still come out pretty cool!


With a stitch ripper or pair of scissors, remove the ties innards so that all your left with is the printed silk material. 


Cut pieces large enough to be able to wrap around the entire egg and secure with a small rubber band or twist tie.


You'll also need to wrap them in an old pillow case or sheet and secure them with another rubber band/twist tie. Again, check your thrift stores... I found a pillow case for $.50. Once they're all wrapped up, carefully plop them into a pan filled with water and 1/4 cup vinegar. 


Bring to a boil. Once boiling, set your timer for 20 minutes. You may have to keep rolling the "floaters." Side note: if you're worried about the pan boiling over, lay a wooden spoon across the top of your pan. It won't overflow... I promise.

After the 20 minutes is up, remove from the boiling water with some tongs and place in a dish or colander to cool down. Once they're cool enough to handle (about 20 minutes), go ahead and unwrap them.


You'll find that your jewel tones (reds, purples, blues...) will transfer the best. Now they're ready for Easter dinner (or all those leftover egg salad sandwiches). Enjoy! 

Wednesday, March 28, 2012

Banana Chocolate Chip (Mini) Muffin recipe

I love breakfast foods. And I love chocolate. So I look for ways to combine the two. (Don't judge.) These tasty little morsels can be made as muffins or mini muffins. Beware! With mini muffins, you may lose count on how many you actually ate!


INGREDIENTS
  • 1 C. mashed bananas
  • 2 eggs
  • 1 C. brown sugar, packed
  • 1/2 C. margarine, melted
  • 1 t. vanilla
  • 2 1/4 C. flour
  • 2 t. baking powder
  • 1/2 t. cinnamon
  • 1/2 t. salt
  • 1 C. chocolate chips
  • 1/2 C. walnuts

INSTRUCTIONS
In medium bowl, beat bananas, eggs, sugar, butter and vanilla until well blended. In large bowl, combine flour, baking powder, cinnamon and salt. Stir in chocolate chips and nuts. Make well in center of dry ingredients. Pour in banana mixture. Mix until just blended. Spoon into greased muffin cups. Bake at 350° for 20 minutes (large muffins) or 12-15 minutes (mini muffins).

Yields: 1 dozen

Monday, March 26, 2012

A lazy Sunday with the kids...

Sweet dreams while spoonin' with me on the couch...
with Clay screaming at little boys on COD... 
"Now Zora, bark once when you see snipers and twice for gernades..."
Daddy's girl
No affection for me during video games... I see where I'm ranked.
Nap time with Daddy...
Getting a little warm...
...let's try the floor.
The Zora couch... juuuust right.

DIY: Make Your Own Swiffer Pads

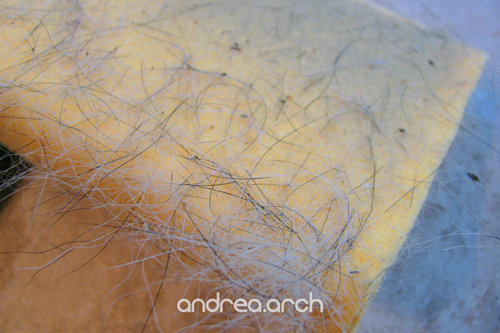
If you own a fleece shirt or jacket AND own a pet, you know that these fierce enemies never play nice. Fleece sweatshirts, blankets and shirts are no match for my fur ball of a dog even after washing and drying. With this frustration in mind, I thought, why not use it to my advantage? A cloth that attracts any dog hair within a 10 foot radius? Sounds like a Swiffer solution to me.

I purchased an old fleece blanket from a thrift store (that supports a local animal shelter, naturally) for around $2. From one blanket, I could get eight approximately 10"x10" squares. I was going to hem up the edges, but who cares!? Not my dirty floor.

I actually think these work better than the actual Swiffer pads. They glide along my floor a lot nicer and pick up the smaller sand particles better. When I'm all done, the large clump of dust and dog hair peels right off to be thrown away. The rest goes into the washing machine and comes out perfectly clean.

Go ahead, try it.


Monday, March 19, 2012

DIY: Upcycle Brass Hinges

If you're anything like me, you probably prefer silver over a gold/brass color. After replacing 96 brass door handles and hinges on my cupboards, we decided to upgrade our door handles to silver as well. However, didn't realize door hinges really only came in brass. Hmm, dilemma.

Not so fast. Did you know you can paint your brass hinges with acrylic craft paint? No? Well, you can. The door hinges in my house took anywhere from 3-5 coats to cover all of the brass hue. In between coats, there may or may not be paint boogers where the joints rub against each other. No biggie. Carefully pick them off and apply your next coat.


After the final coat of paint, cover everything with mod podge for a protective coating. I was quite surprised how well everything covered and how such a simple change made everything really come together.  ...because the brass hinges really stuck out against my black, white and silver decor. 

DIY: The Ultimate Stain Remover

This amazing personal victory needs a little prelude so that you can all understand my absolute happiness at this current moment.

My husband use to drive this POS semi-functional Sonoma. However, it eventually started to run on gallons-per-mile right around the time he needed to make a long commute to work. So we went out and purchased a Malibu for him to drive around instead of the death trap of a truck. Using this vehicle for both work and play, this poor poor car had deer carcasses shoved in the trunk, fish gut incrusted tackle thrown in the backseat, his greasy work shoes imprinted on the driver seat, sticky mountain dew remnants on the floor and center console, little debbie bits ground into the upholstery... etc. etc. (I know, most of you moms out there had to look back in my post and make sure I wasn't talking about a messy toddler.)

Anyways, back in October, my CLEAN, stain-free, beloved car was totaled in an accident. At this point, I knew it was inevitable that we needed a truck again. With our active lifestyle, home remodeling, etc... we needed a vehicle that could haul more than dead animals. So.... standing alongside the highway watching them tow away my car, my husband asked if he could get a truck. Yes, I said that right... I was in an accident and within the hour, my husband was asking for a truck. Go ahead... process. I'll wait.

Being the super awesome incredibly generous wife I am, I let him buy a brand new Ford 150 while I was given the keys to this pig sty of a vehicle. In retrospect, I'm stupid. Since then, I have scrubbed the seats with every stain remover imaginable on 5 or 6 different occasions. With toothbrush and heavy duty carpet scrubber in hand, NOTHING has worked. Mind you, most of these stains have been there almost 4 years. 

UNTIL NOW!
Thank you Pinterest/One Good Thing for recommending a concoction of one part Dawn dish soap mixed with two parts hydrogen peroxide and some baking soda! Again with toothbrush and carpet scrubber, I attacked every square inch of car upholstery and it is COMPLETELY stain free! No joke.

When I went to check on it after everything had dried, I heard the angels singing inside my garage. No longer do I have to fear the thought of driving someone around in my car. I can chauffeur with pride! Small warning though, test this out on a small, inconspicuous spot to make sure the peroxide does not bleach whatever fabric you're using it on.

Go forth readers and conquer stubborn stains! You too will feel unbelievable victorious! 

Saturday, March 17, 2012

(Avocado) Brownie Fudge Bites recipe

Lately I've been on a mission to start incorporating more fruits, veggies and healthy whatnots into my diet. I am a pretty picky eater, so sometimes that requires being creative. This week I purchased 3 vegetables that I've never purchased/eaten before or haven't eaten in awhile. For a lunch meeting at a Japanese steakhouse awhile ago, I was convinced to try edamame. What a tasty and fun lil food to eat! I also purchased some broccoli... which I haven't eaten in about a decade.

My biggest victory of the weekend has been my avocado purchase. Tried avocados once and that was enough for me. After reading that they are a very beneficial food to eat, I decided to try again... this time disguised in something. Behold, chocolate brownie fudge. Figured I'd give it a try.

Delicious lil morsels!!! As long as you really puree the avocado and don't leave any green traces, you will never know there's an avocado in there. These bites are very chocolatey and taste like thicker brownie batter. One serving of avocado, coming right up!


INGREDIENTS
  • 1 avocado, ripened
  • 1/2 C. margarine (this can be a vegan treat as long as you use vegan margarine)
  • 1 tsp. vanilla
  • 1 C. cocoa
  • 3 C. powdered sugar
  • 1/3 C. chopped walnuts (optional)

INSTRUCTIONS
In a medium sized saucepan, melt the margarine over low heat.

Once margarine is melted, puree with avocado in food processor or blender until perfectly smooth. Be sure there are no chunks of avocado left! Return mixture to saucepan over very low heat and add the rest of the ingredients (except the walnuts) adding the powdered sugar a portion at a time.

Once all the sugar has been added, the mixture should be thick. Add walnuts if desired, and transfer to a loaf pan. Refrigerate until firm. Now, be patient! If you don't let it firm up, you won't be able to slice it up into squares.

Thursday, March 15, 2012

How To Find The Original Source of a Pinterest Image

I've seen quite a few people on blogs and Pinterest make comments about not knowing how to find the original source of the photo in question. So I decided to put together a quick tutorial that hopefully helps some people out. This works with any photo found online, not just Pinterest. Please note: there is a slight possibility this won't work and the photo you're looking for may just have appeared from out of no where. These screen shots are all in Safari on a mac. I don't know if it's the same process in other Internet browsers or on PCs, but who cares. PCs are dumb.


STEP 1: Save the photo to your desktop or somewhere on your hard drive. 


STEP 2: Go to Google and click on "images."

STEP 3: Click on the camera icon in the search bar.


STEP 4: Click on the "upload an image" link.

STEP 5: Click on the "choose from" button.


STEP 6: Find the image that you saved on your hard drive.

STEP 7: Select "choose."


STEP 8: Google will automatically start searching the Internet for your image. The link you're looking for may not necessarily be the first one. Check 'em all until you find what you're looking for. Google will also pull up some similar images. 

I had been looking for this incredible giraffe nursery online and this nifty little tool found the original source! Thanks Linde Browning Design for your to die for nursery and to Google for finding it for me! Woot!


Sunday, March 11, 2012

DIY: Michigan string canvas


Depending on your canvas size (I used 8x10), print out an outline of your desired state. I love my Mitten and placed the heart over Holland... were I currently live. Sorry upper peninsula... you didn't make the cut. Tape the printout securely over the canvas.


God bless West Michigan.


Start pushing/hammering your nails around the outline in consistent intervals. Until you hit the wooden frame around the edge of the canvas, the nails push in very easily by hand. You'll have to hammer in the rest.


Carefully remove the printout without pulling out the nails. 


I was originally planning on just wrapping the string around the nails. However, I didn't think things through and used nails with tiny to non-existent heads on them. Awesome. This was how I remedied things. I removed the nails that weren't nailed into the wooden frame. Using a needle and thread, I "sewed" the string in a random order through the existing holes. If you go through a hole, come up through the one right next to it to fully utilize your string and not have a mess on the back.

For the nails that were already permanently in there, I carefully wrapped the string around it tightly several times. Regardless if you thread the string through the hole or around the nail, keep the string taut.... or you will be sorry.


So you don't lose your mind, do not anticipate using one long piece of string. You will die. Your mind will turn to mush and I guarantee you'll throw the canvas against the wall. I used many many pieces and just taped the ends on the back. 

Pin It button on image hover